I’ve been working on a wooden longbow most of the afternoon. Here are ten easy steps for making your own 🙂
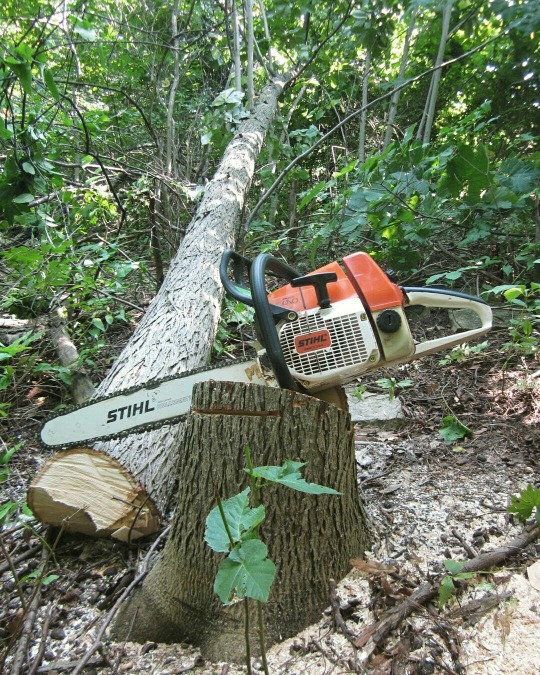
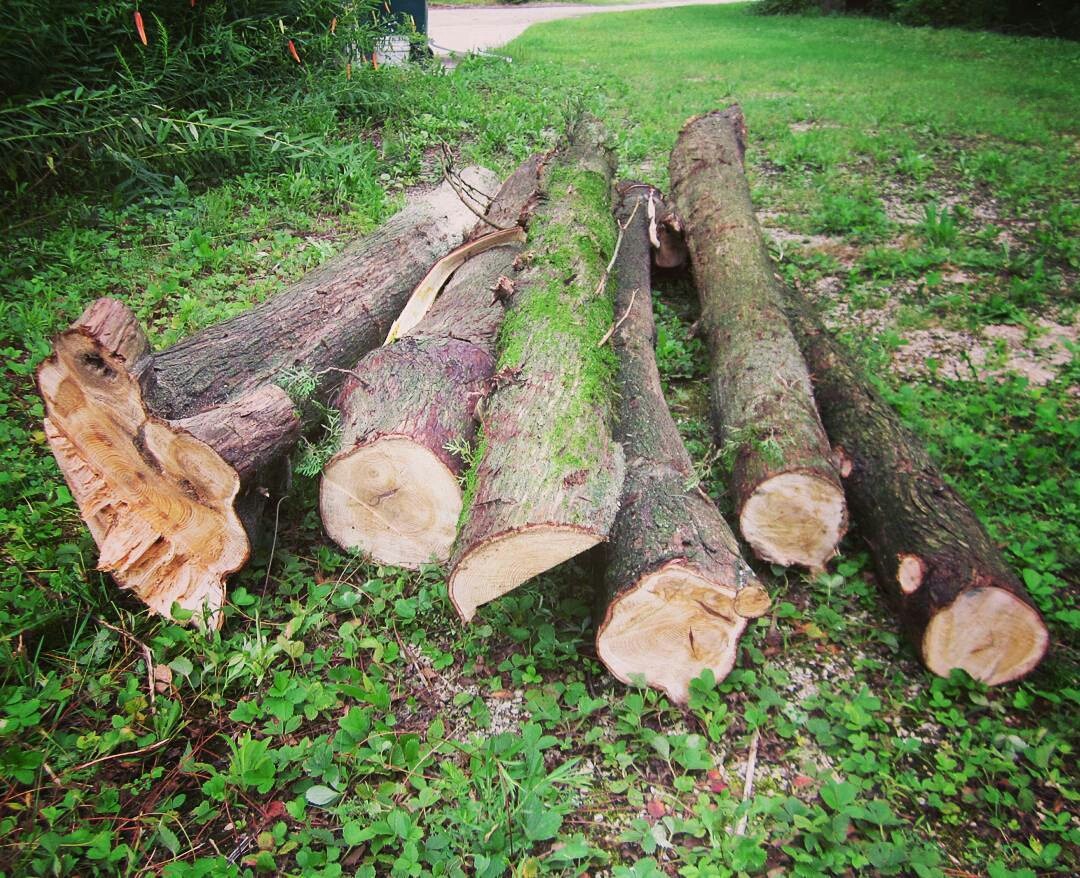
1. Cut down a tree
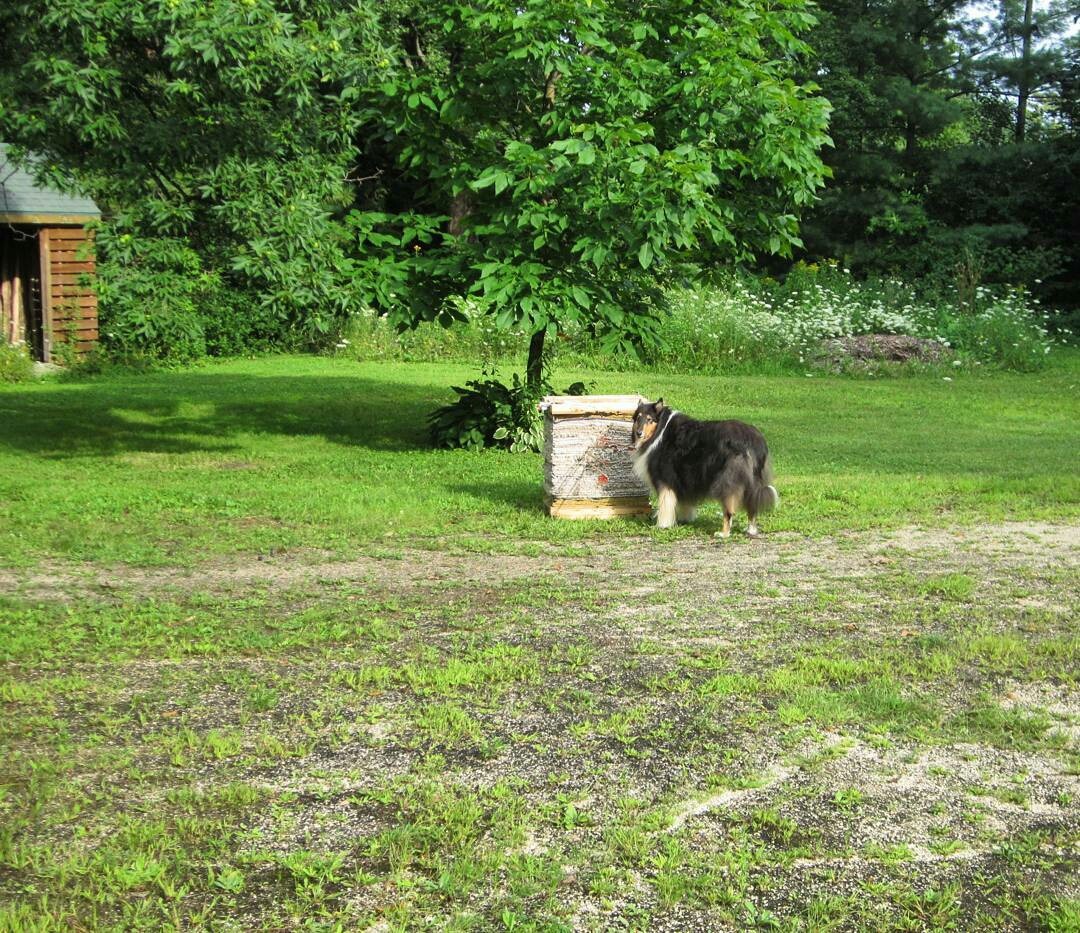
2.Split that tree into lengthwise sections called staves. The dog will help
3. Build a woodshed
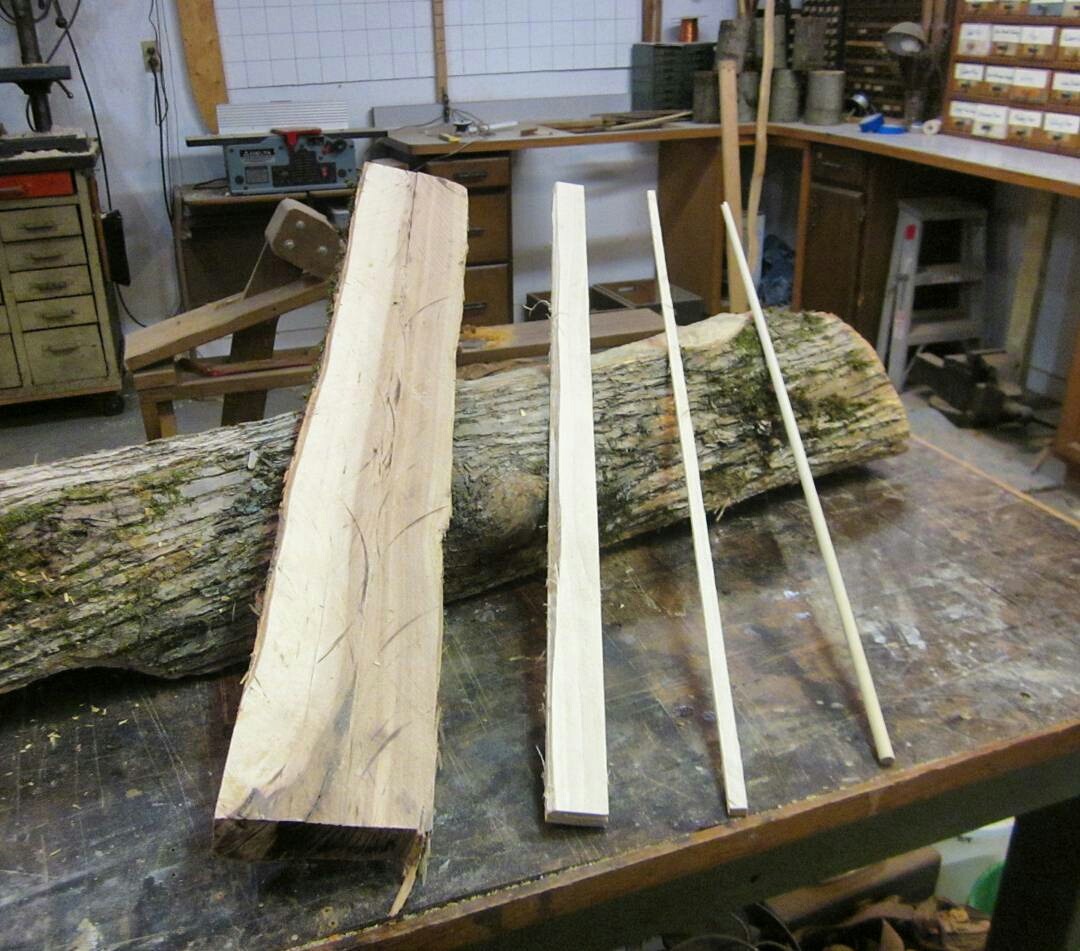
4. Let those staves dry for a few years in the shed
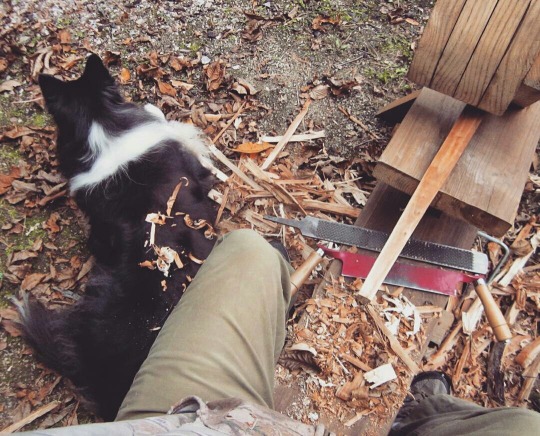
5. Remove all the shit that isn’t a bow. The dog will help again by lying on your foot
6. Make sure the handle stays centered in the growth rings
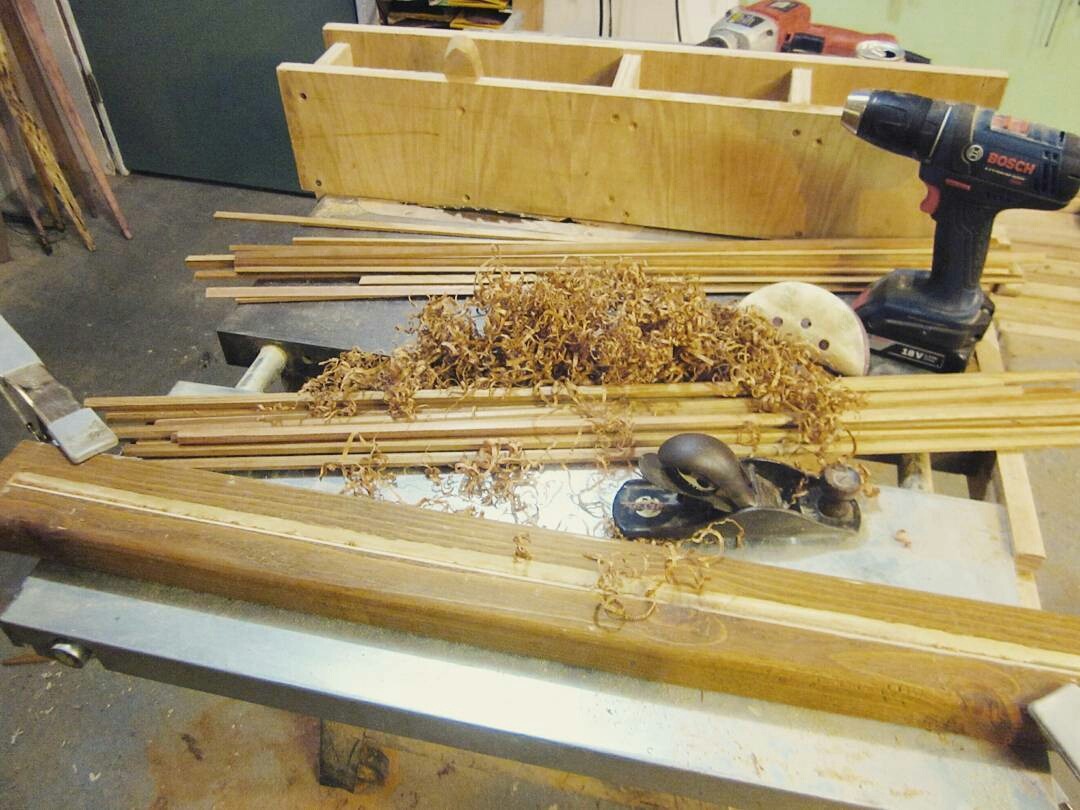
7. Steam bend and weight the wood so that both limbs start with the same bend
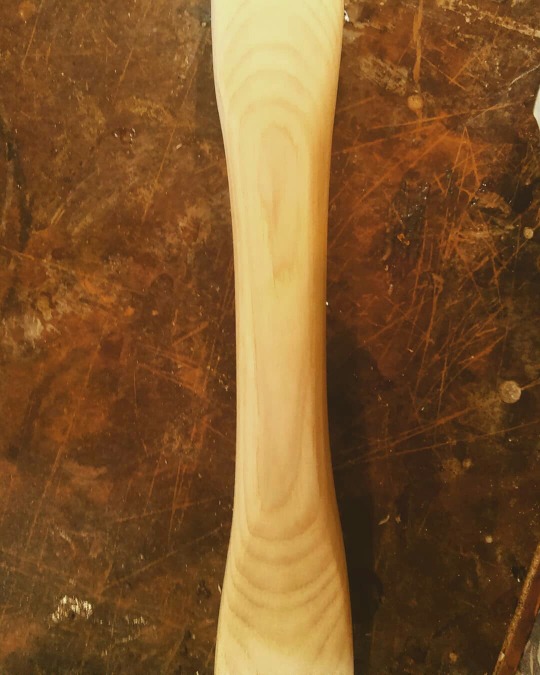
8. Slowly remove wood from the belly of the bow on both sides until they bend evenly
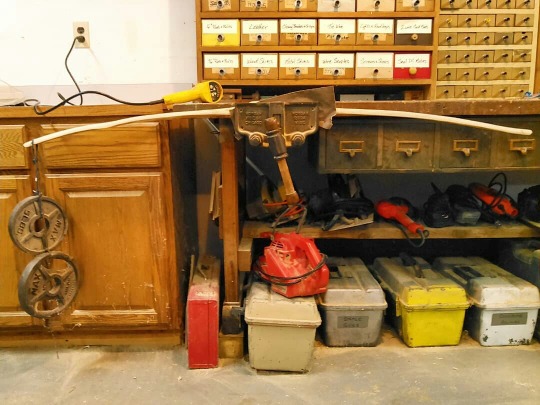
9. Add tip overlays, handle wraps, and all the fancy crap
10. Go out in the yard and practice till hunting season starts
I may need to drive to town for some human contact.
😮
Any particular wood? What was it here? I always meant to try making a bow out of my parents’ overgrown yew shrubbery, but that didn’t work out.
Pictured in the compilation above are shagbark hickory, hop-hornbeam, and common buckthorn. While English yew is rightfully considered one of the best bow woods, almost any straight grained hardwood can make a very nice bow. You can even use maple boards from the hardware store to start.
“Shagbark Hickory,” “Hop-Hornbeam,” and “Common Buckthorn,” all sound like the names middle earth kids give their high school garage bands.
😂😂😂… and now my brain just created Ent Metal as a genre. It’s pretty damn Larghissimo, but very strong.
what a fuckin’ nerd.
Okay now I want to figure out what ent metal would sound like.
I’m thinking thunder and whale song. Somehow.
The amount of notes this has gotten is absurd. That doesn’t happen to my posts, but since you crazy kids seem interested here’s (one of a gajillion ways) to make the accompanying primitive arrows.
We want lighter wood than we used to make the bows. This is white cedar- nice and light and sproingy.
Mill that up into rectangular pieces as long as your arrows need to be.
Then you use this homemade tool called a shooting board to rest them in while you hand plane them from rectangular to round.
You saved your wings from the spring turkey hunt, right? Good, we’re gonna need those primary feathers.
Make yourself a pattern out brass or copper sheet, clamp the feather to it, and burn it with a torch. This will shape the feathers into fletchings.
Now we need to make pine pitch glue by melting together pine pitch (you can pick it off pine trees where they’ve been injured) and hardwood charcoal. Think of it as ancient people’s super glue.
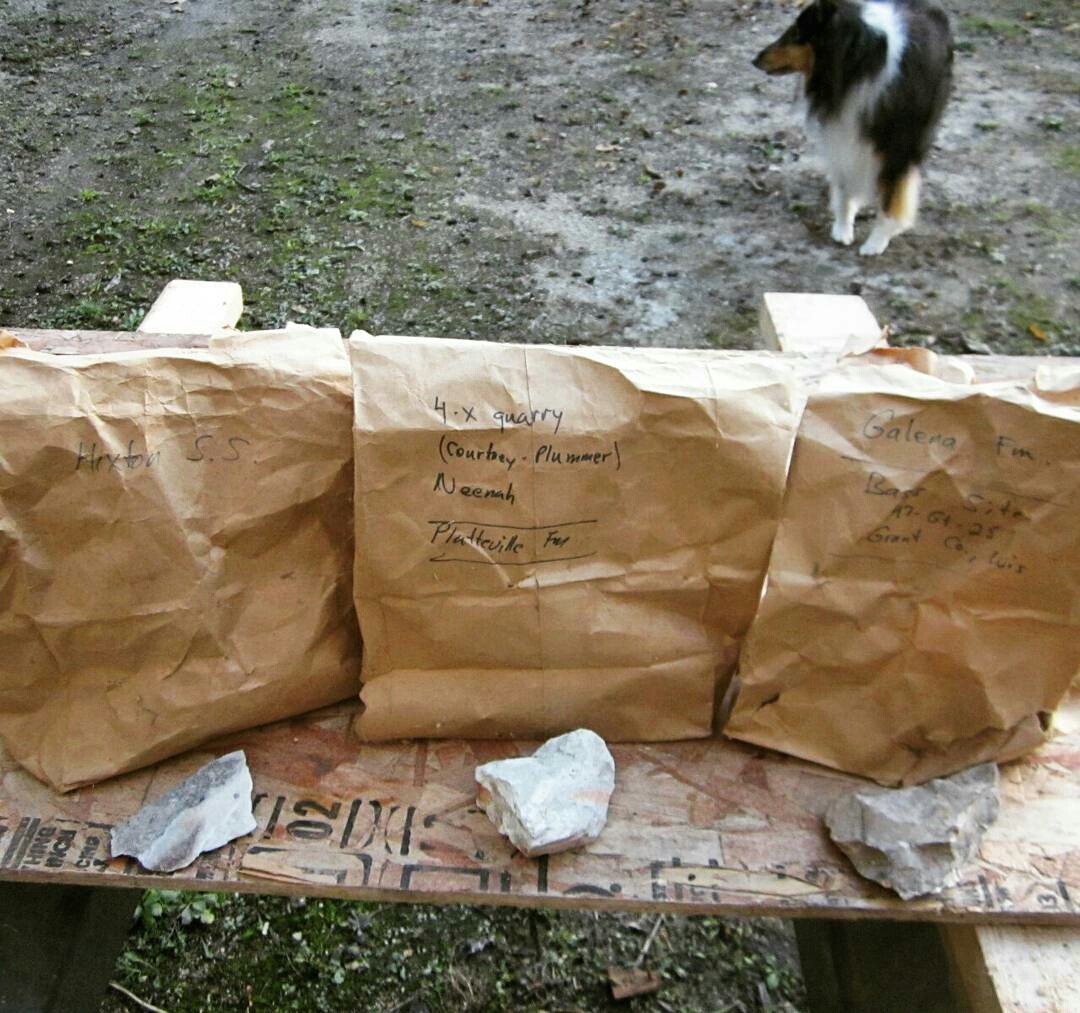
Get your paleontologist buddy to give you some rock from actual Paleolithic quarry sites ‘cuz that’s pretty rad.
Learn flint knapping… he said casually after years of hair-pulling-out struggles with it.
Attach your stone points to your arrow shafts using the ancient super glue stuff and leg sinew from the deer you got last year. Do the same for the fletchings.
And you’re finally ready to start practicing! Don’t worry, the dog will help again by standing directly in front of the target because she’s beautiful and loving, but not very good at critical thinking sometimes.
mansies, this post keeps getting more awesome. 🙂
also, proposal: should Caradhras have a different name in summertime? i’m feelin’ a more Bag End or Hobbiton vibe when the place isn’t covered in show.
You can’t go changing place names seasonally, @danipup What would the maps look like? Every place has 4 names?😂😂
From up the thread- I’m glad all these Old Romantics are into Ent Music.
@systlin this seems like it would be right up your.. archery lane?
Holy shit
You can also do a bath and bend version where you use straight pieces of wood instead of carving them, soak the wood in salted water, set to dry using clamps to shape it; repeat the bath soak then clamp set (moving the clamps for each new set) until your bow is in the preferred shape.
(This is how my uncle taught me to make long bows in his workshop at Howitzer when I was a child. They made a lot of fiberglass bows, which I was too young to be around the manufacturing of, and mostly made compound bows (the ones with pulleys that give more tension to the pull). My uncle designed the Warthog bow for himself and other short people who like to now hunt. OP has a couple of clever life hacks to my uncle’s method (using lifting weights is a genius idea), and an excellent bow making method. I am only sharing a different technique for those who may find soaking easier than steaming (or those who find themselves needing to make a bow in the wild since you could bind the wood around a tree instead of clamping it to shape).
1 yard of patterned fabric (I suggest a polka dot-type pattern so it looks like suction cups)
1 medium piece of black felt, 1 medium piece of white felt (for the eyes)
white thread, black thread and thread of the same color as the felt you’re using
pins
about 5 lbs. of stuffing
a couple big sheets of paper to draw your pattern
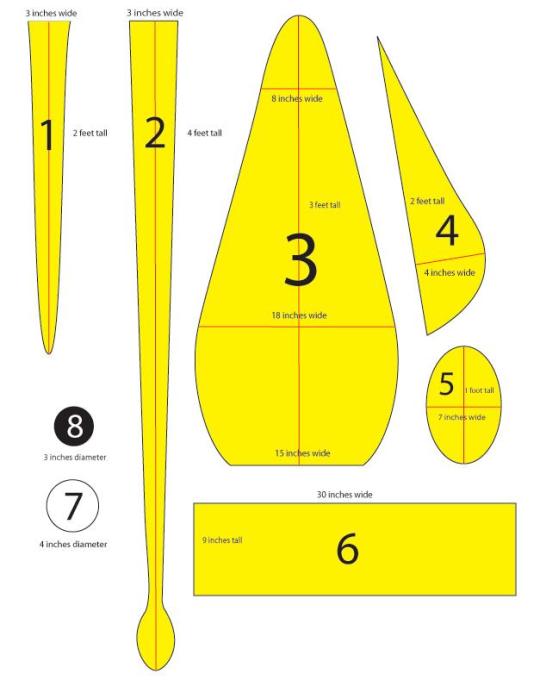
First, you need to draw out your patterns. Here’s a basic template to get you started, although most of the measurements are reasonably fudgeable. If in the likely event you don’t have any four-foot-long pieces of paper lying around, just tape a few pieces together.
Once you’ve drawn out your eight patterns, it’s time to cut the fabric. Pin the pattern to the fabric, laid flat, and cut out the following, leaving a half an inch or so of extra fabric around the edge of the pattern:
FOR THE ARMS: 8 felt and 8 fabric cutouts of piece 1
FOR THE, UH, LONGER ARMS: 2 felt and 2 fabric cutouts of piece 2
FOR THE BODY: 2 felt cutouts of piece 3
FOR THE FIN: 4 felt cutouts of piece 4
FOR THE HEAD: 1 felt cutouts of piece 6
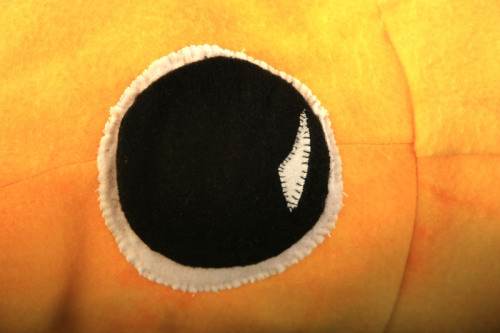
FOR THE EYES: 2 white felt cutouts of piece 7 and 2 black felt cutouts of piece 8
So now you’ve got all your pieces ready, it’s time to start sewing them together. I did mine by hand because my sewing machine is busted and I get a kind of Zen buzz from sewing by hand, but if you have a non-busted one I recommend that you use it as it will be MUCH EASIER. You’re going to be sewing everything with the nice side of the fabric facing in, then turning it inside out to stuff it.
THE ARMS: (To make a quilted pattern that looks like suckers, see this other post). Pin together one patterned fabric piece 1 and one felt piece 1 (with the nice sides facing the inside). Sew down around the U-shape and back up, leaving the top open. Then turn the arm inside out, stuff it (it’s easiest to do both of these things if you sort of scrunch it up like you’re trying to put on a pair of tights, excuse the non-dude-friendly reference) and sew the top closed. Do the same for the other seven arms and rejoice in the fact that this is the most tedious part. Same deal with the two long arms, they’re just harder to stuff.
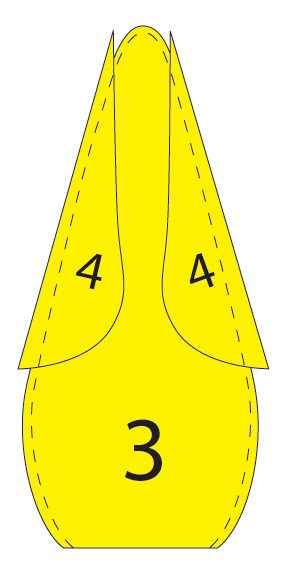
THE FINS: Pin together two of your piece 4s and sew together the curvy outer edge. Turn the piece inside out, so the seam you just sewed is on the inside, and start sewing up the other side, stuffing gradually as you go along. You should end up with a triangle-ish puffy thing. Repeat for the other two piece 4s.
THE BODY: Put down one piece 3, then place the two fins you have down with the point up and the curvy side pointing in, then make a sandwich by putting the other piece 3 down on top. Pin it all together and sew around the edges with the two fins still inside, as shown. Turn it inside out and move on to…
THE HEAD: So take piece 6 and the ten arms you’ve already done. Lay the arms, fabric side facing you, out with the arms’ top seams in a line half an inch from the top of piece 6. The order should be arm arm arm arm BIG ARM arm arm arm arm BIG ARM. The legs should be almost entirely covering piece 6. Pin them in place and sew a straight line through the individual legs seams to attach the legs to piece 6.
When you pick up the other side of piece 6, you now have something resembling a really weird untied hula skirt. Sew together the two 9-inch ends of piece 6 with the fabric side of the arms on the outside, and keep it inside out for the moment.
PUTTING IT ALL TOGETHER: Fit the open end of the body through the arms (still fabric side facing out) and pull the edge all the way through the felt cylinder so it’s even with the edge that DOESN’T have arms attached to it. Sew around the diameters of the head cylinder and the body cylinder to attach them, then pull the legs down over the head and you’re almost done!
Stuff the body, then seal it off by sewing piece 5 over the open end (even if you do have a functional sewing machine, you’ll probably have to do this part by hand).
THE EYES: Sew the black circles on the white circles and whipstitch the eyes onto the head. You do this last because you can’t tell where they’re going to end up on the end product if you put them on before stuffing the body.